

A common misconception about getting solar power is that the installation process is long, complicated, and stressful. Sometimes, this feeling comes from a previous experience the homeowner may have had with a home improvement contractor that was particularly challenging. However, the solar panel installation process is a highly-technical and a very precise operation, requiring a great deal of electrical training and certification, compared to other types of home improvement.
And while a few installations may present challenges that extend the process, the majority of solar panel installations involve a quick and simple streamlined process that can be easy for both the homeowner and the installer. To illuminate just what goes into a common solar installation, let’s look at all the steps in the process so that homeowners can know just what they’re signing up for when they decide to save money by going solar.
1. Choose a Solar Installer
The first step in the solar panel installation process for every homeowner is doing the research on local installers. Over the years, hundreds of solar installers have come and gone in San Diego, and many of them fail due to poor installation practices, pushy sales techniques, misleading contracts, and broken promises. For this reason, homeowners should make sure that the San Diego solar panel company they go with has a good track record: they’re proven to be a successful, dependable company that has been in the business long enough to prove that they provide quality installations and good customer service.
The best way for homeowners to identify these dependable local companies is to look on local review sites like Yelp, Google, and specialized sites like Solar Reviews. Make sure that the majority of reviews are positive. If there are negative reviews, check to see what actions the company may have taken to try and resolve the disagreement or misunderstanding.
Check to see if the company is a member “in good standing” with the Better Business Bureau. In order to maintain this A+ rating, members are required to resolve any problems or disputes quickly and to the satisfaction of all concerned.
Another way to identify high-quality local companies is through local recognition such as awards and media polls. In San Diego, for example, the Union-Tribune Readers “Best of San Diego” Poll is a great way to identify successful local companies that have consistently earned their customers’ trust.
2. Sign a Contract
Once the homeowner has decided on a few companies and compared quotes, they sign a contract with the business they believe offers the best value and can be counted on to best meet to their specific needs. The homeowner should be clear on all the terms of the contract before signing anything. The solar panels are going to be on the roof for a long time, so being sure that everything is clear in the beginning is essential for undergoing the process. All home improvement contracts in the state of California allow homeowners to cancel any signed contracts with no penalty as long as cancellation is done within three (3) business days.
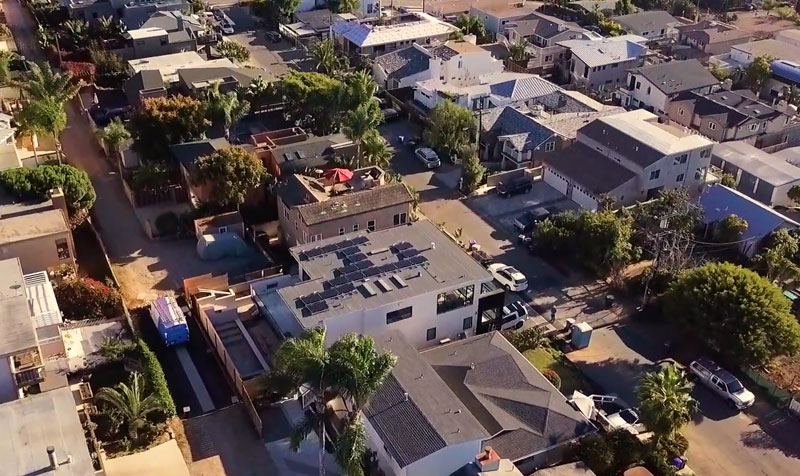
3. Site Evaluation
The site evaluation ensures that your home meets all of the solar panel installation requirements before starting the construction process. After the contract is signed, the solar installer will come out to the home and do a full evaluation of the home’s roof and electric service panel. This allows them to get exact dimensions and technical details needed for the design and drawing of architectural plans for the installation of the system. The person who comes out to do the assessment is typically an engineer that works for the solar company.
During the site evaluation, the engineer will typically assess the condition of the home’s roof to make sure it has no weak spots and that it will adequately support the racking for the solar systems. If the roof has any weak spots or areas where shingles need to be repaired before the solar is installed, the solar company will typically discuss this with the homeowner and can recommend a roofing contractor to do this roof work in conjunction with the solar panel installation. Coordinating the work in this way avoids costly removal of the installed solar systems later on to make the repairs and it also ensures that the overall integrity of the roof surface is maintained by both the solar company and the roofing contractor during the roof solar panel installation process.
The engineer will also look at the home’s service panel to make sure it will be compatible with the solar system. If the capacity of the electric service panel and its main circuit breaker (MCB) box (expressed in amps, such as 100A or 125A) cannot accommodate the size of the solar energy system being installed, the engineer will discuss other options, which may include replacing the electric service panel with a larger one (e.g., replacing 100A panel with a 200A panel). Typically, this service can also be provided by the solar installer or, if necessary, a separate licensed electrician who specializes in electric panel upgrades.
4. Design Creation and Review
Based on the site evaluation and the final contract, the solar installer will then get to work designing the solar system. Working with available roof space (or ground space if the client wants a solar panel ground mount installation instead) and the size of the system (number of panels to be installed), they will design a system which is aesthetically pleasing, structurally sound and also produces the greatest amount of solar energy. Once the design is completed, it is sent to the homeowner for review and approval.
When the homeowner has approved the design, it may also need to be approved by the local Homeowner’s Association or HOA so it’s important for the homeowner to check into this and see what rules apply. Depending on jurisdiction (locality), some HOA’s have fairly strict requirements for solar energy installation, which may include furnishing copies of drawings, etc. for HOA committee. California state law (see “Solar Rights Act”) prohibits HOA’s from turning down approval on solar electric systems for purely aesthetic reasons. However, the law does allow the HOA to set guidelines for uniform installation, which the solar installation company can work with. It is important to know what those regulations are when preparing the initial design.
5. Permit/ Paperwork Filing
After the design is completed and approved by all parties, the solar company will then begin seeking all the necessary approvals and electrical permits needed for an installation. Permit requirements vary from city to city, so the solar company should be knowledgeable of all the requirements and restrictions of every jurisdiction within their service area. If the design does not meet local codes and regulations, the permit office will send back the design for corrections.
The solar installer should also help the homeowner with completing any financial documents they may need. This may include providing or completing forms dealing with incentives, local solar programs, clean energy financing initiatives, or forms to take the federal solar tax credit. The solar installer should be familiar with all these programs so that they can assist the homeowner in taking advantage of as many of them as possible.
6. Equipment Ordering – Installation Scheduling
After all permits are required and paperwork is filled out, the solar installer will then order the equipment necessary for the installation from the distributor. The installer will then schedule the installation time so that the panels can be installed promptly after arrival. During busier months (especially 3rd and 4th Quarter), there may be a longer wait time to complete installation – not just because of the solar installer but also due to high traffic times and possible delays at city permit offices, city inspectors, utility reviewers, and even product shipments. For this reason, deciding to go solar during off-peak can assure that the installation is performed in a swift and timely manner – and may even allow for a product discount too!
7. The Installation
The installation itself usually consists of several steps:
- Installation crews will start by prepping the roof of the house, moving and adjusting any tiles that may be in the path of the racking.
- They then will install the electrical wiring needed for the system, most often going through the attic (if there is one).
- Next, they install the solar racking, the supports of the system, penetrating the roof and building out the system.
- The solar panels are installed on top of the tracking, and hooked up to the electric panel
- The solar monitoring is then installed so that when the panels are producing their production is trackable (Note: this is sometimes a separate step, performed by a different technician some days after the actual installation is completed)
The whole installation process usually takes 1-3 days depending on the scope of the project. There are obviously missteps that can make it take longer, but typically, an experienced installer can get the entire installation done in a day.
Obviously, a ground-mounted solar installation follows a somewhat different process than what was just described for a roof-mounted system. Primarily, this is preceded by a substantial land preparation process (e.g., clearing land or leveling land in order to make a suitable installation spot for the ground mount). Then the electrical conduit (for wiring) must be buried, in a trench, and connected back to the home. Ground-mounted installations, by their nature, are more complicated and dynamic than roof-mounted installations, simply because the terrain is such a big factor in the installation.
8. The Inspection
When the installation is complete, the solar installer will arrange for an inspection with the local jurisdiction (city or county), who will send out an inspector to check the work. Someone from the solar installation company will also be there to answer any questions the inspector may have. This inspection typically occurs within a week of the solar installation, and once passed, the local jurisdiction informs the utility company, which gives the homeowner (their customer) “Permission To Operate” or PTO.
9. System Activation
Once the utility grants Permission To Operate, the system can be activated (turned on). This is usually as simple as flipping a switch – either on the inverter or in the circuit breaker box. Assuming this happens during daylight hours, this will allow the system to start producing electricity and, in many cases, to start sending power back to the grid for credit. At some point before or after this moment, the solar installer should do a full run-through of the monitoring system and other elements of the system with the homeowner to familiarize them with the way the system works overall and answer any questions. Once activated, present solar energy systems require very little homeowner intervention; however, the newest wireless monitoring that comes with the system can provide a lot of information about the system’s status, along with energy production statistics. Understanding these reports means you don’t have to take the utility’s word for it when they send out a bill and you can independently make sure the system is operating normally.
So, there you have it, a step-by-step synopsis of a typical solar installation process. From the beginning to the end of this process, an installation usually takes place in about a month (during off-peak periods) and should never take more than around 3 months (during peak periods).
As you can see, there are endless benefits of installing solar panels on the roof of your home. At SunPower by Stellar Solar, our San Diego solar power professionals have streamlined this process so that we can complete high-quality, dependable installations faster than any other company in San Diego. If you’re in a hurry or have special needs due to travel schedules, etc., ask us about our 30-day install.